În mod implicit, iTunes sau Finder realizează copii de rezervă ale dispozitivelor iOS într-un folder profund îngropat pe unitatea internă. Nu există o setare specifică pe care să o puteți activa și alege o altă locație. Aceste copii de rezervă pot rula în mai mulți gigaocteți. Astfel, pentru o mai bună gestionare a spațiului de stocare, vă recomandăm să vă schimbați locația de rezervă pentru iPhone pe Mac sau PC. Permiteți-mi să vă arăt cum puteți muta locația implicită de backup iOS.
- Schimbați locația de rezervă a iPhone-ului pe Mac Rulând macOS Catalina sau o versiune ulterioară
- Restabiliți folderul de rezervă iPhone în locația sa originală pe Mac
- Schimbați locația de backup iTunes utilizând iPhone Backup Extractor
- Locația de backup iTunes a fost deja modificată, dar nu puteți vedea backupul?
- Cum să schimbați locația de backup iTunes iOS pe computerul Windows
Schimbați locația de rezervă a iPhone-ului pe Mac Rulând macOS Catalina sau o versiune ulterioară
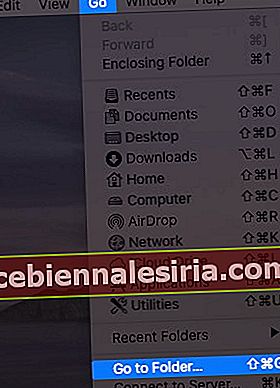
- Din bara de meniu de sus, faceți clic pe Go → Go to Folder ... Tastați sau copiați-lipiți această adresă exactă ~ / Library / Application Support / MobileSync.

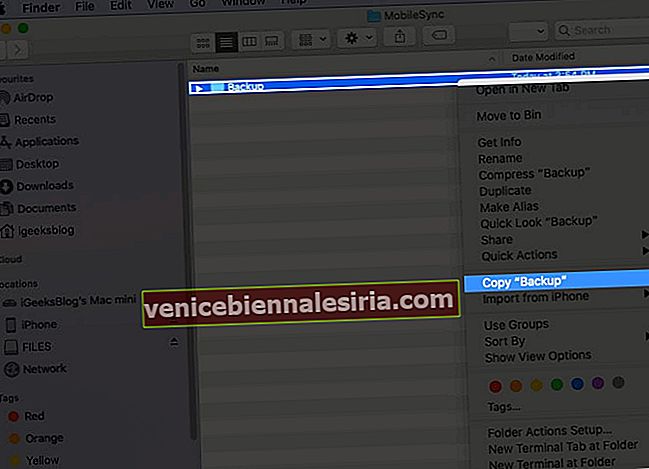
- Acum vă aflați în locația în care Mac-ul dvs. face copiile de rezervă în mod implicit. Faceți clic dreapta pe folderul Backup și selectați Copiați „Backup” .
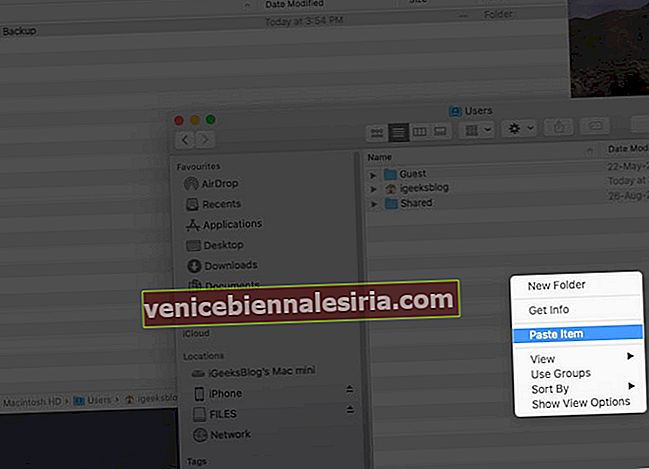
- Acum, (deschideți o a doua fereastră Finder și) mergeți la locația în care doriți noul folder de rezervă pentru iPhone. Poate fi Desktop, Documente, un nou folder undeva. Când vă aflați în acea locație, faceți clic dreapta și selectați Lipire element . Lăsați procesul de copiere a folderului de backup curent în această nouă locație. Păstrați fereastra Finder deschisă. Veți avea nevoie de acest lucru la pasul 6 de mai jos.
- După copiere, reveniți la prima fereastră Finder (~ / Library / Application Support / MobileSync), faceți clic dreapta pe folderul Backup și alegeți Redenumire (sau selectați folderul și apăsați tasta Enter).
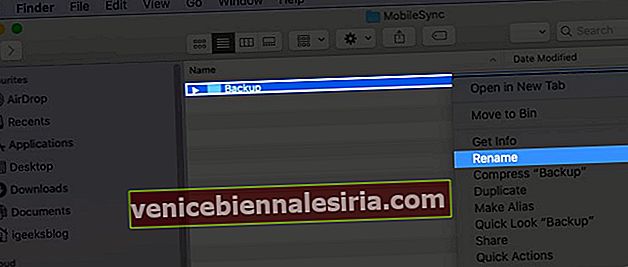 Acum adăugați .old la numele fișierului. Ca rezultat, acest nume de folder va arăta ca Backup.old
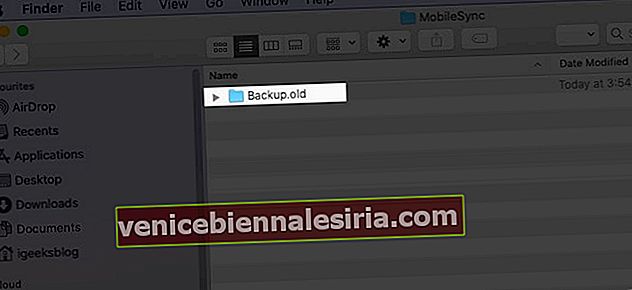
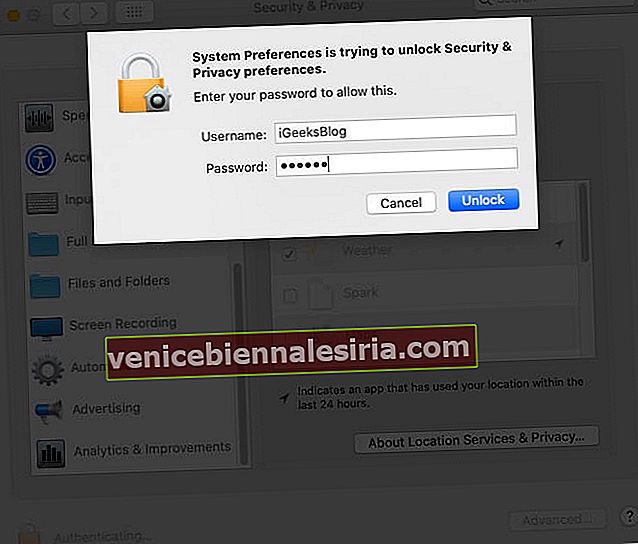
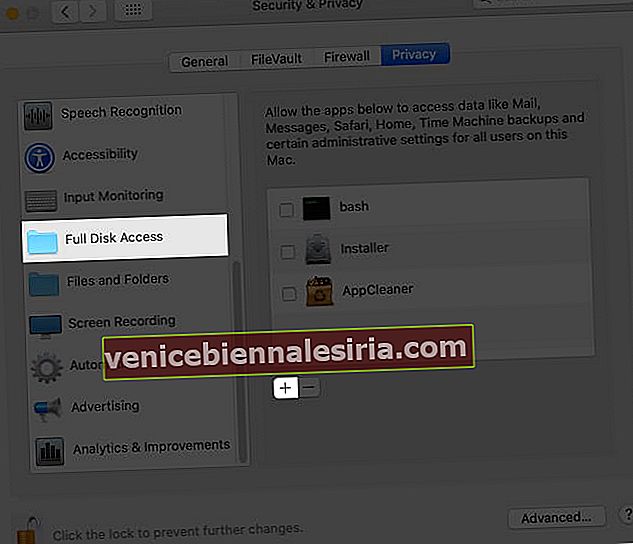
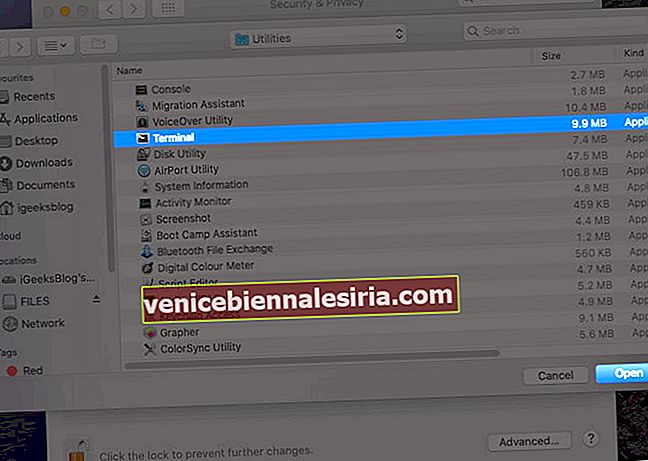
- Din partea de sus din stânga, faceți clic pe logo - ul Apple → System Preferences → Securitate și confidențialitate → confidențialitate fila → faceți clic pe pictograma de blocare și introduceți parola Mac la proceed.Now, din bara laterală din stânga, faceți clic pe Full Disk Access → click pe pictograma minusculă plus ( + ). Din aplicația → folderul Utilități → selectați Terminal și faceți clic pe Deschidere . După aceasta, puteți face din nou clic pe pictograma de blocare și puteți închide această fereastră.

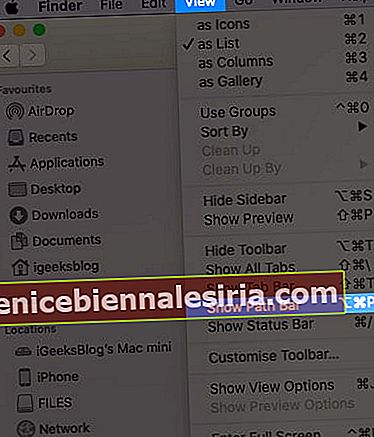
- Acum, trebuie să știți locația exactă a noului folder de backup. Pentru aceasta, din fereastra Finder, faceți clic pe View din bara de sus și alegeți Show Path Bar . Veți vedea un rând subțire în partea de jos care vă arată locația exactă a acestui nou folder de backup. Păstrați această fereastră deschisă.

- Apăsați Command + Spacebar , căutați Terminal și deschideți-l. Apoi, trebuie să editați următoarea comandă pentru a se potrivi computerului dvs. și apoi tastați-o / lipiți-o în fereastra Terminal.
ln -s /Volumes/Drive/Backup/ ~/Library/Application\ Support/MobileSync/ - Foarte important: Editarea comenzii de mai sus: Deschideți o aplicație simplă de notepad sau un site precum editpad.org. Acum, vă rugăm să copiați comanda de mai sus și să o lipiți acolo. Apoi, trebuie să înlocuiți / Volumele / Unitatea / Backup / cu locația folderului dvs. Backup.
De exemplu, consultați captura de ecran de mai sus. Locația folderului meu Backup este Macintosh HD → Utilizatori → Backup . Deci comanda va arăta astfel:
ln -s /Volumes/Macintosh\ HD/Users/Backup/ ~/Library/Application\ Support/MobileSync/Dacă un nume de locație are două sau mai multe părți / cuvinte precum Macintosh HD, trebuie să puneți o bară inversă și un spațiu unic. De exemplu, Macintosh \ HD
ln -s /Volumes/Donald/Backup/ ~/Library/Application\ Support/MobileSync/ln -s /Volumes/Donald/iPhone/Backup/ ~/Library/Application\ Support/MobileSync/Now, you know how to change the path address in the command. Next, let us make use of it.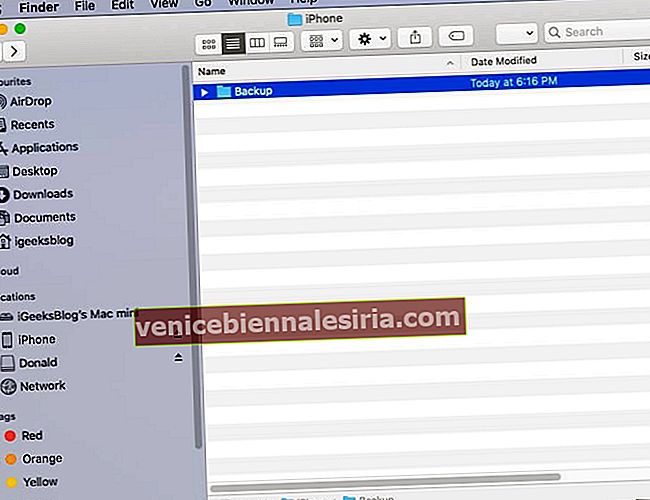
Copy the final command, paste it in the Terminal, and press the enter key.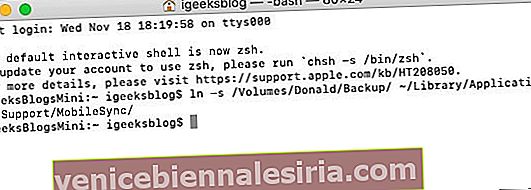 Tip: Now, when you go to the original Backup.old Finder window, you will see a new folder named Backup, which will have a small arrow on it.
Finally, open Finder on your Mac, connect the iPhone, Trust it, and click on Back Up Now. The backup would be made and saved at the new location.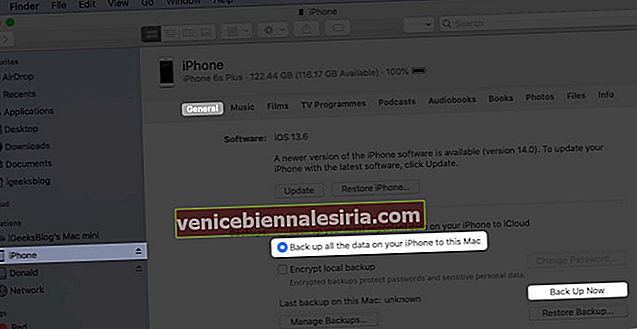


 Acum adăugați .old la numele fișierului. Ca rezultat, acest nume de folder va arăta ca Backup.old


 Tip: Now, when you go to the original Backup.old Finder window, you will see a new folder named Backup, which will have a small arrow on it.
Notes:
Optional: After you complete the first backup at the new location, you may choose to delete the Backup.old folder. This may free significant space on your Mac.If you opted to back up your iPhone to an external drive, make sure you connect it to the Mac before hitting Back Up Now in the future.
Restore iPhone Backup Folder to its Original Location on Mac
From the Finder window, click on Go → Go to Folder → and enter this location ~/Library/Application Support/MobileSyncRight-click on the folder with an arrow icon and select Move to Bin.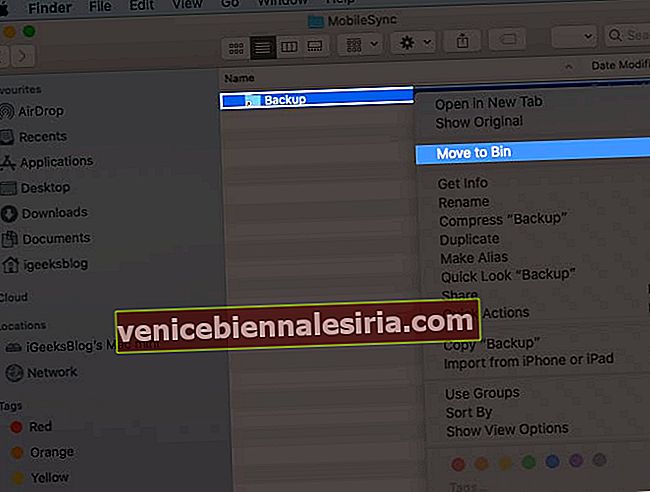
Now, for safety, drag (or copy-paste) the current Backup folder to this location. All future iPhone backups will be saved here, like before. Even if you do not follow this step, the next time you make the device backup, a new folder named Backup will automatically be created.

Do you not want to follow the lengthy process above? Well, here is the most straightforward way to change the iTunes/Finder iPhone backup location on Mac.
How to Change iTunes Backup Location Using iPhone Backup Extractor
Download iPhone Backup Extractor for free and complete the installation.Important: First time, you may have to open the System Preferences → Security & Privacy → Privacy tab → click on the padlockicon, and enter your Mac’s password. Now, click on Full Disk Access and then the plus sign (+). Next, select iPhone Backup Extractor and click Open.
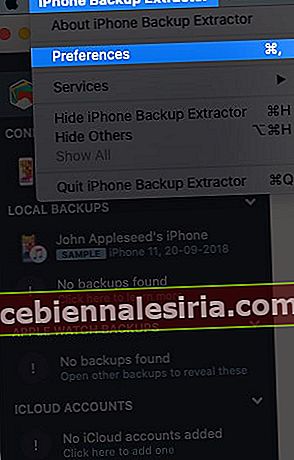
Now come back to the iPhone Backup Extractor app window. (If needed, click on ‘OK, I’ve made this change, let’s restart the app to continue!’) From the top menu bar, click on iPhone Backup Extractor → Preferences → Backups → Change. Now, you may see a popup saying ‘Backup contains data.’ Click on ‘Open.’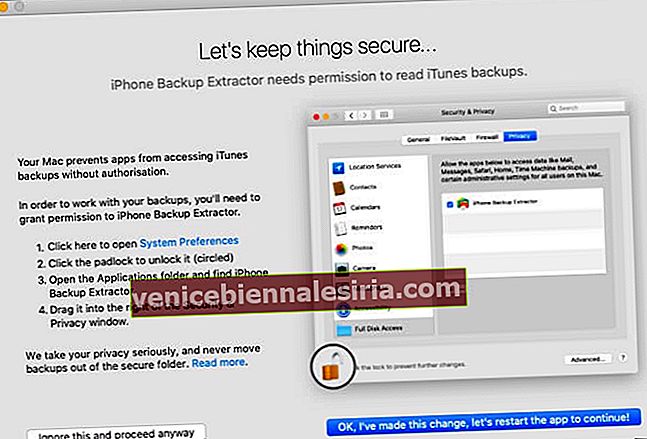
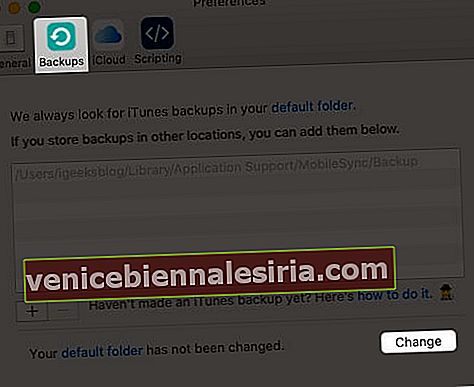
From here, drag the folder with a lengthy name like 149652….. to someplace else, like the Desktop.After that, inside the iPhone Backup Extractor app, click on Change and Select the desired folder.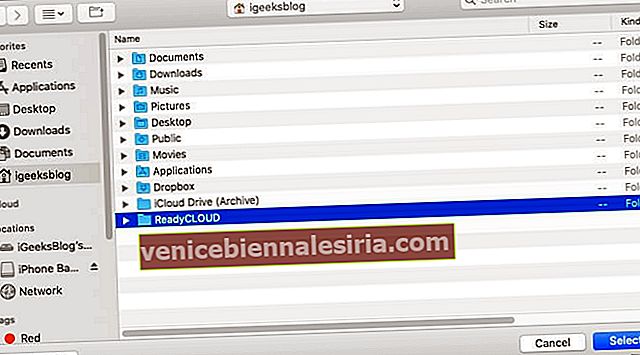


Done! You have successfully changed the iPhone backup folder in just a few steps. To undo this change, click on Revert.
Already Changed iTunes Backup Location But Unable to See the Backup?
Even after you have correctly followed the above steps and are unable to find the backup, then we have a separate guide that has you covered.
Most of the time, if you follow the first manual step, the problem arises due to the wrong location address of the new Backup folder. You must get that right. If this is wrong, go to ~/Library/Application Support/MobileSync and you will see a white Backup symlink instead of a blue folder named Backup with an arrow.
How to Change the iTunes Backup Location on Windows PC
As iTunes won’t let you change it, you need to make way through a symbolic link. Also known as a symlink, it’s a bridge that connects two folders with the same name. Using a symlink, you can direct iTunes to back up data to a dummy folder that you’ll have to create. However, you’ll have to enter some commands in the “Run As Administrator” window. Just make sure that you create a dummy folder in a drive with enough storage space. Like, we created it in D:\. Let’s get started by creating a folder first.
Create a folder named “MobileSync” in the D:\ (d stands for drive) on your computer.To view the by-default location, go to C:\Users\UserName\Apple\MobileSync if you have downloaded iTunes from Windows 10 Store. For the old desktop version, you need to go to C:\Users\UserName\AppData\Roaming\Apple Computer\MobileSyncCut and paste the Backup folder to the new MobileSync folder that you’ve created in D:\Now, run CMD as administrator. To do so, press Windows + R keys together, then type cmd in the search field.Press Ctrl + Shift + Enter to run it as in the administrator.Enter the command mentioned below.
If you’ve downloaded iTunes from the Microsoft store. MkLink /J “C:\Users\UserName\Apple\MobileSync\Backup” “D:\MobileSync\Backup
Enter this code MkLink /J “C:\Users\UserName\AppData\Roaming\Apple Computer\MobileSync\Backup” “D:\MobileSync\Backup” if using the older version.
Now when you back up your iPhone using iTunes, the data will be stored in the D:\MobileSync\Backup folder. Try backing up your iPhone and check if the Backup folder in the D:\ is configured correctly.
iPhone Backup Location Changed Successfully!
This is how you can have new iOS or iPadOS backups to a different location. Changing to some other folder on the same internal disk makes little sense. But doing the same on an external disk frees space on your internal disk.
I hope the above guide was helpful. In case you are facing difficulty at any step, feel free to reach us via the comments section below.
You may also like to read:
Find iPhone Backup Location on Mac and Windows PC3 Ways to Check Folder Size on MacHow to Use Control Center in macOS Big SurHow to Backup and Install iPhone Apps from Mac/Windows Without iTunes


![Cum se formează o extensie pe iPhone [2021]](https://pic.venicebiennalesiria.com/wp-content/uploads/blog/883/4VR7WCQXSYpic.jpg)